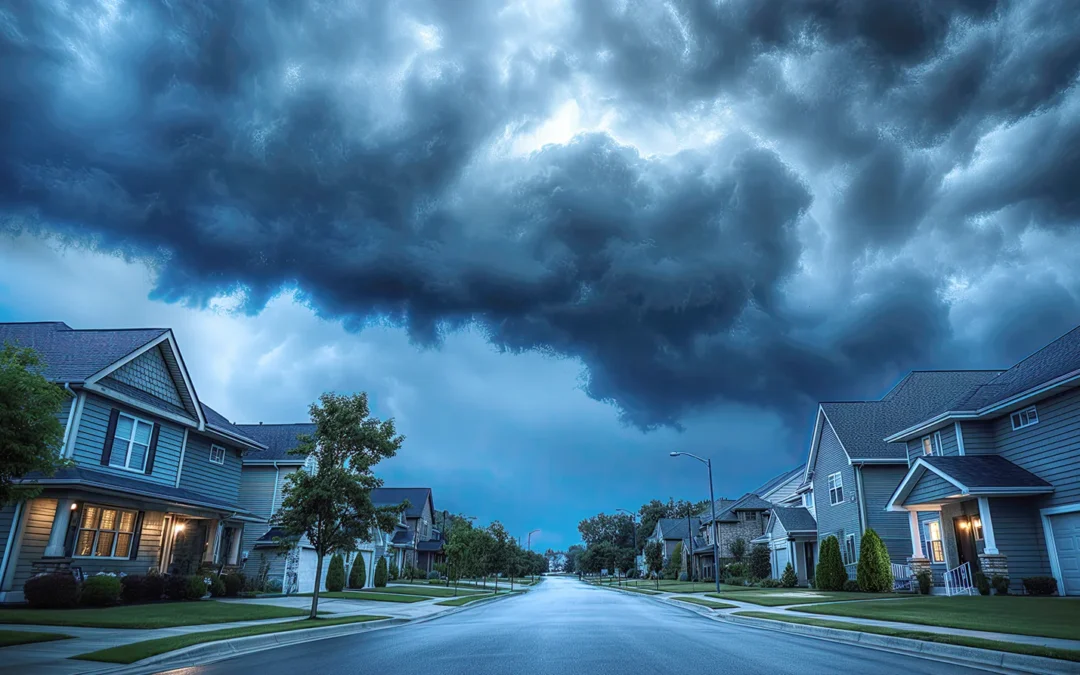
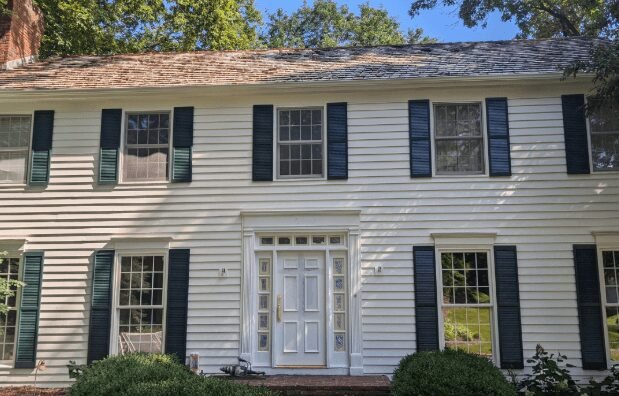
Do not wait for heavy rain or high wind to find out that a shingle is loose, a gutter is blocked, or flashing has opened around a vent. A pre-storm roof check should cover the roof surface, flashing, gutters, roof edges, attic, nearby trees, and anything mounted on the roof.
Start from the ground and from accessible areas inside the home. Do not climb onto a wet, steep, icy, or damaged roof. A roofing contractor should handle roof access, repairs, and any condition you cannot inspect safely.
Storm Preparation Starts Before the Forecast Turns Urgent
Complete roof and gutter work while conditions are dry and contractors can inspect the property safely. Once a severe thunderstorm or high-wind warning has been issued, focus on shelter and emergency preparation rather than climbing ladders or attempting roof repairs.
New Jersey Roof Maintenance Checklist
Area
What to look for
Next step
Shingles and roof surface
Missing, lifted, cracked, curled, or loose material
Schedule repair before wind and rain reach the exposed area
Flashing and penetrations
Open seams, rust, gaps, loose metal, or worn seals
Have a roofer check chimneys, vents, skylights, and wall connections
Gutters and downspouts
Debris, standing water, sagging sections, loose fasteners, or overflow marks
Clear the drainage path and repair loose or damaged sections
Fascia and soffit
Soft wood, peeling paint, stains, gaps, or detached panels
Repair damaged roof edges before wind-driven rain reaches them
Attic and ceilings
Stains, damp insulation, musty odors, daylight, or active drips
Trace the leak source and correct it before the next storm
Trees and outdoor items
Weak branches, dead limbs, or loose objects near the house
Use a qualified tree professional and secure movable items
Flat or low-slope areas
Blocked drains, debris, open seams, punctures, or signs of ponding
Clear drainage and have membrane damage inspected
Roof-mounted equipment
Loose brackets, cables, fasteners, covers, or sealant
Have the equipment and surrounding roof connection secured
Check Shingles and the Roof Surface From the Ground
Walk around the property in daylight and view each roof slope from a safe location. Binoculars or a camera with zoom can help you inspect without using a ladder.
Look for missing shingles, lifted edges, cracked tabs, loose ridge caps, exposed fasteners, and areas that no longer lie flat. Check the yard and gutters for pieces of roofing material. On metal roofs, look for shifted panels, loose trim, rusted fasteners, or open seams. On flat roofs, visible debris and blocked drainage deserve attention even when no leak has appeared indoors.
A small defect may still expose underlayment or a roof joint to wind-driven rain. Arrange shingle roof repair when damage remains limited. An inspection should determine whether the surrounding material can support a repair or whether a wider section has deteriorated.
Inspect Flashing, Vents, Chimneys, and Skylights
Many roof leaks begin where the roof meets another surface. From the ground, look for flashing that appears bent, lifted, rusted, or separated around chimneys, walls, plumbing vents, skylights, and roof valleys.
Inside the attic, stains below a chimney, vent, or roof-to-wall connection may point to an opening above. Water can travel along decking or framing before it appears on a ceiling, so the indoor stain may not sit directly below the entry point.
Do not smear sealant over an unidentified leak. A temporary surface patch can hide the opening without correcting damaged flashing or material below it. Use roof inspection and leak detection to trace the water path and document the repair area.
Clear Gutters and Confirm Where Downspouts Drain
Leaves, shingle granules, branches, and roof debris can slow drainage when rain becomes heavy. Check for standing water, overflow marks, separated joints, sagging sections, and downspouts that have pulled away from the wall.
Water should move through the downspout and discharge away from the foundation without flowing across a walkway or back toward the house. A gutter that overflows at one corner may have a blockage, poor slope, loose support, or an undersized drainage path.
Wind-driven rain can enter through damaged roof edges even when the main roof surface looks intact. Look for peeling paint, dark stains, soft wood, open joints, detached soffit panels, and gaps where gutters connect to fascia.
Roof-edge damage can also affect gutter support. Repair loose fascia, soffit, drip edge, and gutter fasteners before high wind has a chance to pull them farther away from the structure.
Look for Moisture Inside the Attic and Home
Use a flashlight to inspect accessible attic areas without stepping between joists or disturbing wiring and insulation. Look for dark decking, damp insulation, water trails, rusted fasteners, musty odors, and daylight entering through the roof.
Check ceilings and upper walls for new stains, bubbling paint, soft drywall, or discoloration around vents and chimneys. These signs need attention even if the area feels dry when you inspect it.
Check for dead, cracked, or overhanging branches that could strike the roof, gutters, siding, or service lines. Do not cut large limbs near the house or utility lines yourself. Use a qualified tree professional for work that requires climbing, rigging, or powered equipment.
The National Weather Service also recommends making a list of outdoor items that need to be tied down or moved before high wind. Secure patio furniture, grills, planters, tools, decorations, and loose construction materials before the wind begins.
If a branch has already hit the roof, stay away from the damaged area and any nearby power line. Request a tree-damage roof inspection after emergency hazards have been addressed.
Check Flat and Low-Slope Roof Drainage
Flat and low-slope roofs need an open drainage path before heavy rain. From a safe access point, look for debris around drains and scuppers, water marks that suggest recurring ponding, lifted membrane edges, punctures, open seams, and loose flashing.
Do not walk across a membrane that may be wet, brittle, or damaged. A contractor should inspect the surface, drainage points, penetrations, and material below any soft or stained area.
Photograph the Property Before the Storm
Take dated photographs of each roof slope from the ground, along with gutters, downspouts, siding, fascia, soffit, skylights, chimneys, and nearby trees. Photograph existing wear separately so you can distinguish it from new damage later.
Keep inspection notes, estimates, repair invoices, warranty information, and contractor photographs together. A contractor can document visible conditions and prepare a repair scope. Your insurance company decides whether your policy covers a loss.
What Can You Check Yourself?
Most homeowners can complete a ground-level visual review, check ceilings and accessible attic areas, test downspout discharge from the ground, photograph existing conditions, and secure movable outdoor items.
Call a roofing or exterior contractor when the inspection requires roof access, a tall ladder, removal of roofing material, moisture tracing, flashing work, gutter realignment, or repair near electrical service. Call sooner when you see exposed decking, active water, sagging material, a fallen branch, or damage across several roof areas.
When Should You Schedule a Roof Inspection?
Schedule enough time to complete repairs before severe weather reaches the area. Arrange an inspection when you notice a leak sign, missing material, loose flashing, repeated gutter overflow, a branch impact, or changes after a previous storm.
A professional roof maintenance visit can cover shingles, flashing, penetrations, roof edges, drainage, visible attic moisture, and repair priorities. Ask for photographs and a written explanation of what needs immediate work and what can be monitored.
What Should You Check After the Storm?
Wait until local authorities say conditions are safe. From the ground, look for missing shingles, fallen branches, damaged gutters, loose siding, debris, and water entering the home. Stay clear of downed wires, unstable trees, standing water near electrical equipment, and visibly sagging ceilings.
Photograph new damage before cleanup when you can do so safely. Keep receipts for temporary protection and emergency work. If several exterior systems were affected, request a storm damage inspection that covers the roof, gutters, siding, fascia, soffit, and interior water entry.
Common Roof Maintenance Questions
Should I climb onto the roof to complete the checklist?
No. You can inspect many warning signs from the ground and inside the home. A trained contractor should handle roof access, especially when the surface is steep, wet, icy, damaged, or difficult to reach.
Does a roof need inspection if there is no ceiling leak?
Yes, when you can see missing material, loose flashing, damaged roof edges, blocked drainage, or storm impact. Exterior damage may exist before water reaches a finished ceiling.
Can gutter problems cause roof or interior damage?
Blocked, loose, or poorly draining gutters can direct water toward fascia, soffit, roof edges, siding, and the foundation. The repair should address both the blockage and any damaged supports or drainage connections.
Should I inspect the roof before or after a storm?
Both checks serve different purposes. The pre-storm inspection finds conditions you may still have time to repair. The post-storm inspection documents new damage and identifies emergency work.
Schedule a Roof Maintenance Inspection in New Jersey
One Call 24-7 checks roof surfaces, flashing, vents, skylights, gutters, roof edges, drainage, and visible leak signs. We explain what needs repair before the next storm and document the areas we inspect.
Missing, lifted, cracked, or leaking shingles do not always mean you need a full roof replacement. A repair may be enough when damage is limited and the surrounding roof remains sound. Replacement may make more sense when leaks keep returning, damage covers several areas, shingles have become brittle, or the roof deck has moisture damage.
A proper inspection should show you the damaged areas, the condition of the surrounding shingles, and any signs of water below the roof surface. You should understand those findings before approving repair or replacement.
Is Water Entering the Home Right Now?
An active leak changes the first decision. Stop the water from spreading before comparing long-term repair options.
Move furniture, electronics, and valuables away from the wet area.
Use a container to catch dripping water if you can reach the area without touching electrical fixtures.
Photograph ceiling stains, dripping water, and visible exterior damage from a safe location.
Do not climb onto a wet, icy, steep, or storm-damaged roof.
Call for emergency help if shingles are missing, decking is exposed, or water is spreading through the attic or ceiling.
A repair can make sense when the problem stays within one area and the rest of the roof still performs as expected. The inspection should confirm that the repair can connect to sound surrounding material.
Signs that support a repair
A small number of shingles are missing, cracked, or lifted after wind.
The leak comes from one flashing detail, exposed fastener, vent, or roof penetration.
The nearby shingles remain flexible enough to work around without breaking.
The visible roof deck feels firm and does not show widespread moisture damage.
Interior staining appears below one identifiable entry point.
The roof has not developed repeated leaks across different slopes.
Color and texture may differ when new shingles are installed beside weathered shingles. Ask the contractor to show you the closest available match and explain how the repaired area will look from the ground.
When Roof Replacement May Make More Sense
Replacement becomes a stronger option when a small repair would leave widespread weak material in place. The decision should come from the condition of the roof, not from one stain or one missing shingle.
Signs that support replacement
Leaks have appeared in several rooms or returned after earlier repairs.
Large areas contain cracked, curled, loose, or brittle shingles.
Wind or storm damage reaches more than one roof slope.
Soft decking, staining, or trapped moisture appears below several areas.
Repairing one section would disturb weak shingles around it.
Flashing, underlayment, ventilation, and roof-edge details need broader correction.
The cost of repeated repairs keeps growing without solving the underlying condition.
A contractor should explain which parts need replacement and why. Ask for photographs of the affected slopes, flashing, penetrations, and visible decking concerns.
Repair or Replacement: What Changes the Decision?
Condition
Repair may fit
Replacement may fit
Damage area
One small, defined section
Several slopes or widespread wear
Leaks
One confirmed entry point
Repeated or multiple leak locations
Surrounding shingles
Secure and workable
Brittle, loose, curled, or breaking
Roof deck
Firm around the damaged area
Soft, stained, or damaged in several places
Previous work
Few earlier repairs
Recurring repairs without a lasting result
This comparison helps you understand the options, but it cannot replace an inspection. Water can travel along decking, rafters, insulation, or wiring before appearing on a ceiling.
What Should a Shingle Roof Inspection Include?
A useful inspection looks beyond the shingle directly above the stain. The source may sit higher on the slope or around a nearby roof detail.
Flashing and penetrations: chimneys, walls, vents, skylights, plumbing stacks, and roof-to-wall connections.
Roof edges: drip edge, fascia, gutters, downspouts, and signs that water is backing up.
Attic and ceilings: stains, damp insulation, visible daylight, moisture paths, and soft finishes.
Decking: visible soft spots, staining, movement, or deterioration where access allows.
Ventilation: blocked or damaged vents that may contribute to heat and moisture problems.
If the source is unclear, schedule roof inspection and leak detection. Ask for photographs and a written explanation of what needs attention now.
What Affects the Cost of Shingle Roof Work?
A reliable estimate needs the roof dimensions and an inspection of the damaged area. A price given without those details may leave important work outside the estimate.
The number of damaged shingles and roof slopes
Roof height, pitch, access, and staging needs
Shingle type, color availability, and matching limitations
Flashing work around walls, chimneys, skylights, and vents
Decking or underlayment found damaged after shingles are removed
Gutter, fascia, soffit, or roof-edge damage tied to the same leak
Temporary protection needed before permanent work can begin
Permit and code requirements that apply to the work
Ask the contractor to separate known work from possible additional work. The estimate should explain how hidden decking damage will be documented and approved if removal exposes it.
What Should You Do After Wind or Storm Damage?
Start with safety and documentation. Take ground-level photographs of missing shingles, fallen branches, damaged gutters, and debris. Photograph interior water marks and keep receipts for temporary protection or cleanup.
A contractor can document visible damage and prepare a repair scope. Your insurance company decides whether the policy covers the loss. One Call 24-7 does not act as a public adjuster or decide coverage. Learn more about contractor photographs, repair scopes, and insurance documentation support.
If wind, hail, or a fallen branch affected more than the shingles, request a storm damage inspection that also checks siding, gutters, fascia, soffit, and interior water entry.
Questions to Ask Before Approving Roof Work
Where is the water entering, and what evidence supports that finding?
How much of the roof is affected?
Can the surrounding shingles support a repair?
Did the inspection find soft decking or attic moisture?
What work belongs in the repair estimate?
Which conditions could change the price after removal begins?
How will the contractor protect the home if weather arrives before completion?
What workmanship and material warranties apply?
Is the contractor licensed and insured for the work in New Jersey?
Common Questions About Shingle Damage
Can one missing shingle cause a roof leak?
One missing shingle can expose a joint, fastener, or underlayment to water, but the location and surrounding condition determine the risk. Have the area checked before the next heavy rain.
Does a ceiling stain mean the roof needs replacement?
No. A ceiling stain may come from a localized shingle, flashing, vent, or plumbing problem. The inspection needs to trace the water path before anyone recommends replacement.
Can new shingles match the existing roof?
A close product match may be available, but weathering can change the color and surface of existing shingles. Ask to see the proposed replacement shingle beside the roof before work begins.
Can a repair delay roof replacement?
It can when damage is isolated and the surrounding roof remains serviceable. A repair will not correct widespread brittle shingles, recurring leaks, or damaged decking.
Should the roof be inspected after a storm if there is no leak?
An inspection can identify lifted shingles, loose flashing, punctures, and damaged roof edges before water reaches the ceiling. Schedule the inspection after conditions are safe.
Get a Clear Repair or Replacement Recommendation
One Call 24-7 provides shingle roof repair and replacement in New Jersey. We inspect the damaged area, show you the visible findings, and explain whether a focused repair or broader replacement fits the roof condition.
In New Jersey, water damage happens often due to heavy rain, nor’easters, frozen pipes bursting in winter, roof leaks, and basement flooding. When water gets into your home, the first decision many homeowners face is: handle it yourself or call a professional?
The answer depends on how fast you act, how much water entered, and where it went. This guide breaks down the real difference between DIY water cleanup and professional water damage restoration — so you can make the right call before the damage gets worse.
Why Water Damage in New Jersey Is Especially Serious
New Jersey homes face specific water damage risks year-round:
Nor’easters and heavy storms drive water through roofing, flashing, and siding
Basement flooding is common in Essex, Hudson, Bergen, and Union counties due to older infrastructure
Frozen pipe bursts during January-February cold snaps can release hundreds of gallons in minutes
Roof leak damage goes undetected for months, saturating insulation and framing
Hurricane and tropical storm remnants bring sustained rainfall that overwhelms drainage systems
Once water enters a home, the clock starts immediately. Mold growth can begin in as little as 24 to 48 hours in NJ’s humid summer conditions.
DIY Water Damage Cleanup: What Usually Happens
Most DIY water damage cleanup includes:
Towels, mops, or shop vacs to remove standing water
Home fans or small box dehumidifiers
Cleaning only visible water and wet surfaces
Opening windows if weather permits
This may dry the surface, but moisture often stays trapped inside walls, subfloors, and insulation. In many New Jersey homes — especially older construction in Essex and Hudson counties — this leads to mold within 24 to 48 hours. At that point, the cost to remediate is significantly higher than early professional drying would have been.
When DIY Cleanup Works
DIY is appropriate only when all of the following are true:
Water source is clean (not sewage or stormwater runoff)
Total affected area is under 10 square feet
Water has been present less than 24 hours
No wall, ceiling, or flooring materials are wet below the surface
No vulnerable residents (infants, elderly, immunocompromised) live in the home
If any one of these conditions isn’t met, professional restoration is the right choice.
Professional Water Damage Restoration: How It Works
DIY vs Professional Water Damage Restoration: Side-by-Side Comparison
Factor
DIY Water Cleanup
Professional Restoration
Water Removal
Surface-level only
Deep extraction including hidden moisture
Drying Equipment
Household fans
Industrial air movers and dehumidifiers
Moisture Detection
None
Thermal imaging and moisture meters
Mold Risk
High
Low with antimicrobial treatment
Drying Time
7 to 10 days
2 to 4 days
Insurance Support
None
Full documentation and claim assistance
Long-Term Cost
High — mold remediation and hidden damage
Lower with proper, complete restoration
Health Risk
Mold exposure, contaminated water hazards
Controlled and documented process
The Hidden Cost of Waiting
Many New Jersey homeowners wait because the damage looks minor. This delay often causes:
Mold growth behind drywall and under flooring
Warped hardwood floors and swollen subfloors
Ceiling stains that indicate ongoing structural saturation
Rust and corrosion in structural fasteners
Damaged insulation that loses R-value and holds moisture
Delayed action can also hurt your insurance claim. Most homeowners insurance policies include language about “prompt mitigation.” If the insurer determines you waited without taking reasonable steps to prevent further damage, they can reduce or deny your payout. See how insurance claims assistance works for water damage in NJ.
Water Damage Restoration in New Jersey: Where We Serve
One Call 24-7 responds to water damage emergencies across northern and central New Jersey, including:
Essex County — Irvington, Newark, Montclair, South Orange, Maplewood, West Orange
Union County — Elizabeth, Westfield, Summit, Cranford, Clark
Hudson County — Jersey City, Hoboken, Bayonne, Union City, Kearny
Bergen County — Hackensack, Paramus, Teaneck, Fort Lee, Ridgewood
Morris County — Morristown, Parsippany, Dover, Madison, Chatham
Monmouth County — Asbury Park, Red Bank, Freehold, Long Branch
The water came from a storm, sewage backup, or roof leak
Any vulnerable residents (infants, elderly, people with respiratory conditions) live in the home
Call One Call 24-7 now at (800) 668-2455. We respond 24/7 across New Jersey and can typically dispatch within the hour for emergencies.
Frequently Asked Questions: Water Damage Restoration in NJ
How long does water damage restoration take?
Most structural drying takes 3 to 5 days with professional equipment. If materials like drywall or flooring need to be removed and replaced, the full restoration can take 1 to 3 weeks depending on the scope. A professional assessment after the initial water extraction will give you a more accurate timeline.
Will my homeowner’s insurance cover water damage in New Jersey?
It depends on the source. Sudden and accidental water damage — such as a burst pipe or appliance failure — is typically covered by standard homeowner’s insurance. Flood damage from external sources like storms or rising water requires separate flood insurance. One Call 24-7 provides full damage documentation and photo reports to support your claim.
How do I know if there is hidden water damage in my walls?
Signs of hidden water damage include discoloration or soft spots on drywall, peeling paint or wallpaper, a musty smell in a specific room, unexplained increases in your water bill, or visible mold near baseboards. Professional moisture mapping with thermal imaging can detect hidden saturation that is not visible to the eye.
Can I stay in my home during water damage restoration?
In many cases, yes — as long as the affected area is contained, drying equipment is not creating safety hazards, and there is no sewage contamination or significant mold growth. Your restoration team will advise based on the specific situation after the initial inspection.
What is the difference between water mitigation and water restoration?
Water mitigation is the emergency phase — stopping further damage, extracting water, and setting up drying equipment. Water restoration is the repair phase — replacing damaged materials, rebuilding walls and floors, and returning the home to pre-loss condition. One Call 24-7 handles both phases so you do not need to coordinate between two separate contractors.
About the Author
Pedro Guaman is founder and lead contractor at One Call 24-7, a NJ-licensed roofing and restoration company serving northern and central New Jersey. With over 15 years of hands-on experience in residential water damage restoration, storm damage repair, and insurance claims assistance, Pedro has overseen hundreds of water mitigation and property rebuild projects across Essex, Hudson, Bergen, Union, and Morris counties.
Hosting Family This Thanksgiving? Make Sure Your Home Is Ready
The holidays are about warmth, gratitude, and bringing loved ones together. But nothing spoils Thanksgiving faster than an unexpected home issue — a roof leak during dinner, water stains on your ceiling, or chilly drafts from damaged siding.
At One Call 24/7, we understand that hosting family means your home should be comfortable, safe, and welcoming. That’s why we help New Jersey homeowners prepare their homes before the holiday rush with professional roof repair, gutter cleaning, siding restoration, and complete exterior inspection services.
Whether you’re cooking for ten or hosting a full house, a well-maintained home makes the season brighter — and prevents costly surprises later.
Why Thanksgiving Home Prep Matters
In November, temperatures drop, winds pick up, and fall debris fills your gutters. Many homeowners overlook these small seasonal changes, but they can lead to major problems — water intrusion, damaged shingles, and rising energy bills.
Before you finalize your holiday menu, take a few hours to give your home a quick check-up. With One Call 24/7, you’ll have peace of mind knowing your property is ready for guests, gatherings, and unpredictable weather.
Thanksgiving Home Maintenance Checklist
1. Roof Repairs Even a few missing or loose shingles can let water seep through during rain or snow. Our roofing team identifies problem areas early and ensures your roof is completely sealed.
2. Siding Fixes Cracked, warped, or missing siding panels not only affect curb appeal but also allow drafts and moisture inside. We offer siding repair and replacement for vinyl, fiber cement, and engineered siding systems.
3. Gutter Cleanup Leaves, twigs, and debris clog your gutters during fall. If ignored, they cause overflow, roof leaks, and even foundation damage. We provide complete gutter cleaning and inspection before winter storms hit.
4. Full Exterior Inspection Our technicians carefully examine flashing, vents, roof valleys, and trim to detect hidden weaknesses. A pre-holiday inspection helps ensure that your home is safe, efficient, and ready for guests.
Family-Owned. Faith-Based. New Jersey Trusted.
As a family-owned and faith-based company, One Call 24/7 is built on values of honesty, integrity, and craftsmanship. We help New Jersey homeowners prepare their homes for every season, from small repairs to complete roof replacements.
We believe in doing it right the first time. Our written estimates, high-quality materials, and clean, respectful crews have earned us the trust of hundreds of families.
Don’t Wait Until the Last Minute
Your home deserves as much preparation as your Thanksgiving meal. Schedule your inspection or minor repairs before guests arrive — and rest easy knowing your home is protected inside and out.
Call One Call 24/7: (800) 668-2455 or (908) 447-5518 Visit:www.onecall24-7.com Serving Bergen, Essex, Hudson, Middlesex, Morris, Passaic, Somerset & Union Counties.
Restoring Homes. Rebuilding Peace of Mind. Anytime. Anywhere. We’re There.
Natural disasters can strike without warning, leaving homeowners with the daunting task of navigating storm damage insurance claims. The unpredictability of these events often means that homeowners must act quickly to mitigate damage and begin the insurance process. Understanding this process is crucial to getting your home back in shape as swiftly as possible.
This guide aims to simplify the storm damage insurance process, focusing on hail and wind damage and helping you make informed decisions about repairs and roof installation. By breaking down the steps and considerations involved, you can approach this task with confidence and clarity.
Understanding Storm Damage Insurance
Storm damage insurance is designed to cover your home in the event of damage from natural disasters such as hail, wind, and other severe weather conditions. These policies are a financial safety net, ensuring that homeowners aren’t left to bear the full brunt of repair costs in the aftermath of a storm.
It is essential to understand your policy’s specifics to ensure you receive adequate compensation. Familiarizing yourself with the terms and conditions of your insurance can prevent unpleasant surprises and ensure a smoother claim process.
What Does Storm Damage Insurance Cover?
Most standard homeowner insurance policies cover storm damage, including:
Hail and Wind Damage: These are common causes of roof damage, leading to leaks or structural issues. The impact of hail can be severe, causing dents and cracks that compromise the integrity of your roof. Wind can tear off shingles or cause trees and debris to collide with your home, resulting in significant damage.
Roof Damage: Policies often cover the cost of repairs or replacement. This coverage is crucial as roof repairs can be one of the most expensive aspects of storm damage. The extent of coverage might vary, so it’s important to know whether your policy covers just repairs or full replacements.
Other Structural Damages: This may include windows, siding, and other parts of your home. Broken windows and damaged siding can lead to further interior damage if not addressed promptly. Ensuring that these elements are covered can save you from additional costs.
It’s important to review your policy and know what is included and excluded. Some policies might not cover certain types of damage, or they might require additional riders for full coverage. Riders are policy add-ons that provide extra protection for specific scenarios, which can be invaluable depending on your location and the typical weather patterns you face.
Steps to Take After a Storm
After a storm hits, acting quickly and methodically can make the insurance process smoother. The immediate aftermath of a storm can be chaotic, but having a clear plan can make a significant difference. Here are some steps to consider:
1. Ensure Safety First
Before inspecting your property, ensure it’s safe to do so. Avoid any downed power lines or unstable structures. Safety should always be the top priority, as the risk of injury is high in these situations. If there is any doubt about the safety of your property, wait for emergency services or professionals to assess first.
2. Document the Damage
Take detailed photos and videos of the damage. This documentation will be crucial when filing your insurance claim. Make sure to capture images from multiple angles and distances to provide a comprehensive view of the damage. This evidence will help substantiate your claim and can expedite the approval process.
3. Make Temporary Repairs
If possible, make temporary repairs to prevent further damage, like covering broken windows or leaking roofs with tarps. Keep receipts for any materials purchased, as these may be reimbursable. Temporary measures can prevent further water ingress and additional structural damage, protecting your home until permanent repairs can be made.
4. Contact Your Insurance Company
Notify your insurer about the damage as soon as possible. They will guide you on how to proceed with your claim. Early notification allows the insurance company to prioritize your claim and provides you with a clearer understanding of the next steps in the process, including timelines and required documentation.
Filing a Storm Damage Insurance Claim
Filing a claim can be complex, but understanding the steps can help you get the coverage you need. Preparation and attention to detail are key components of a successful claim. Here’s how to navigate the process:
1. Understand Your Policy
Review your insurance policy to understand your coverage and deductible. Knowing what your policy covers can help you set realistic expectations for your claim. Familiarize yourself with any unclear terms, and don’t hesitate to ask your insurance agent for clarification.
2. Schedule an Inspection
Your insurance company will likely send an adjuster to assess the damage. Be present during the inspection to ensure all damages are recorded. Your presence can ensure that nothing is overlooked and provides an opportunity to ask questions directly to the adjuster about the process and findings.
3. Work with a Roofing Contractor
Engage a reputable roofing contractor to provide an independent assessment of the damage. This can help you understand the scope of repairs needed and provide a second opinion if the insurance adjuster’s assessment is lower than expected. An independent assessment can serve as a valuable point of comparison and can support your claim if discrepancies arise.
4. Submit Your Claim
With documentation in hand, submit your claim to the insurance company. Include all photos, videos, and estimates from your roofing contractor. A well-documented claim can significantly expedite the processing time and improve the likelihood of receiving a fair settlement.
Finalizing Your Insurance Claim
Once the insurance company processes your claim, you’ll receive a settlement offer. Here’s how to proceed to ensure the best outcome:
1. Review the Settlement
Carefully review the settlement offer to ensure it covers all necessary repairs. If it falls short, you can negotiate with your insurance company. Understanding the details of the offer allows you to pinpoint any discrepancies and address them promptly.
2. Complete the Repairs
Use the settlement to hire your chosen roofing contractor to complete the repairs. Ensure all work is completed before signing off on the project. A thorough inspection post-repair can prevent future issues and ensure the job meets your expectations.
3. Keep All Documentation
Maintain records of all communications, contracts, and receipts related to your claim and repairs. This documentation can be crucial for any future claims or disputes. Organized records provide a comprehensive trail of the process and can serve as evidence if discrepancies arise later.
Preparing for Future Storms
While you can’t prevent natural disasters, you can prepare to minimize potential damage and streamline future claims. Proactive measures can significantly reduce the impact of future storms on your property.
Regular Maintenance
Regularly inspect and maintain your roof to prevent minor issues from becoming major problems. Clean gutters, check for loose shingles and address small repairs promptly. Routine maintenance can extend the life of your roof and reduce the severity of damage in a storm.
Understand Your Insurance Policy
Review your policy annually and update it as needed to ensure adequate coverage. Consider additional riders for specific risks in your area. Staying informed about your coverage can prevent future coverage gaps and ensure you’re always adequately protected.
Emergency Preparedness Plan
Develop a plan for your family to follow in the event of a severe storm. This includes knowing evacuation routes, assembling an emergency kit, and securing important documents. A well-thought-out plan can enhance your family’s safety and provide peace of mind during chaotic situations.
Conclusion
Navigating the storm damage insurance process can be challenging, but understanding your insurance coverage, acting promptly, and working with reputable professionals can ease the burden. By being proactive and informed, you can ensure your home is repaired efficiently and effectively, allowing you to return to normalcy as quickly as possible. The knowledge and preparation you invest now will serve you well in managing future events with greater confidence and assurance.
For expert storm damage repairs and assistance with your insurance claim, contact ONE CALL 24/7 ROOFING & RESTORATION in NEW JERSEYA today. Let us help you get back on track with reliable, high-quality service every step of the way.